This post may contain affiliate links. Read our disclosure here.
You all know I’m all about being frugal, but sometimes there are things that I know would be frugal but that seem overwhelming because I’ve never done them before. Redoing furniture is one of those things. I know plenty of people who have done it, but I had never tried.
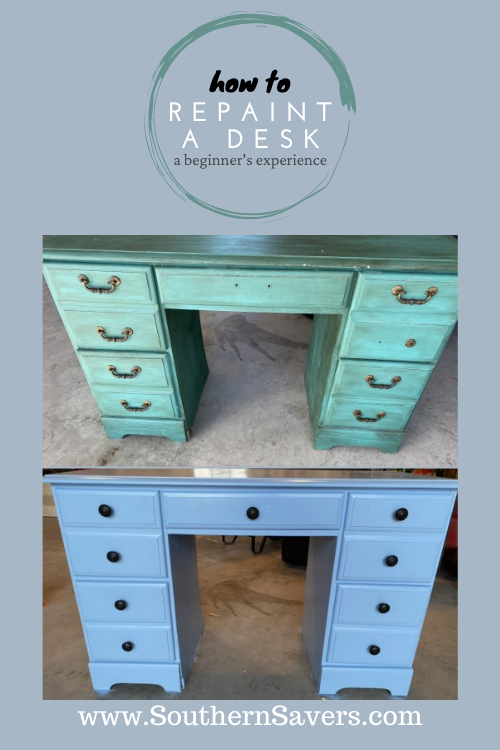
But then someone we knew was getting rid of a desk, and I really needed a new desk. I decided to take the free desk and see if I could figure out how to make it work. If you’re wondering how to repaint a desk, here’s documentation of my experience as a total beginner!
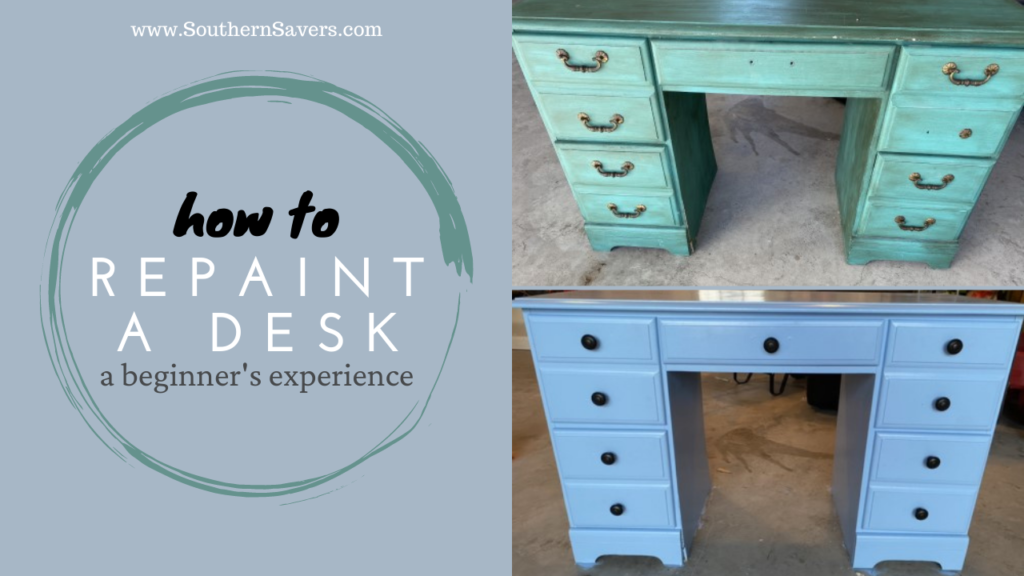
How to Repaint a Desk: A Beginner’s Experience
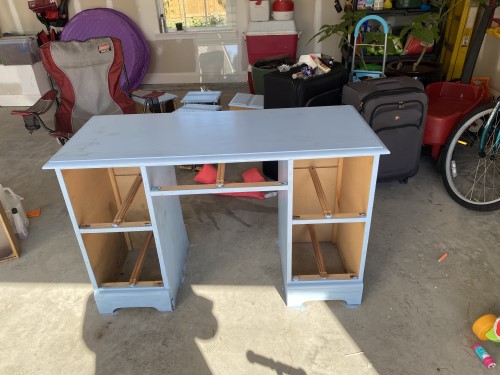
The first step was, of course, to get the desk to my house! We put it in the garage to begin with.
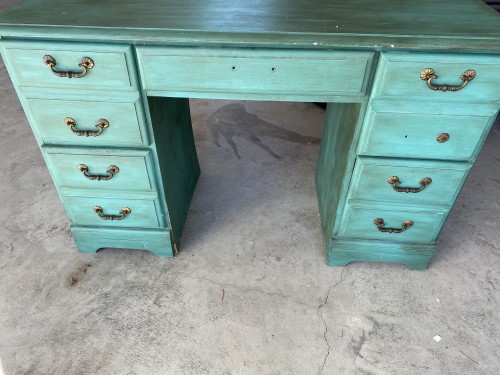
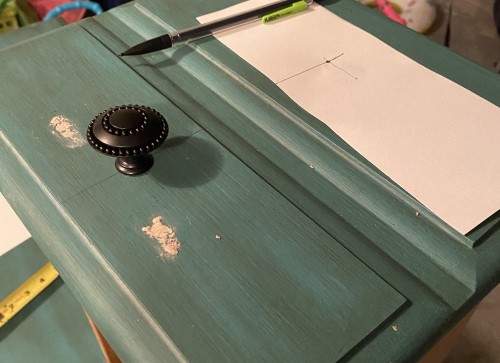
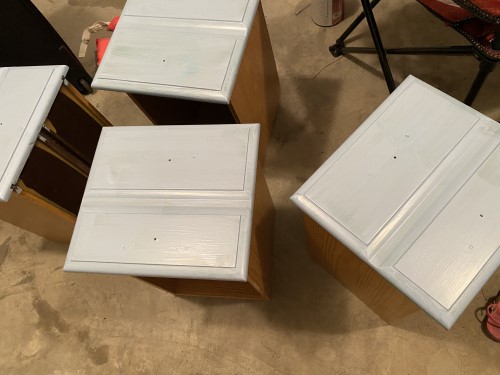
Here is what it looked like when I received it. It looked like someone had attempted to repaint it already but hadn’t finished. Some of the hardware was missing or broken. With my very limited knowledge, I knew that the whole process would be three big steps: sanding / preparing to paint, painting, and replacing the hardware.
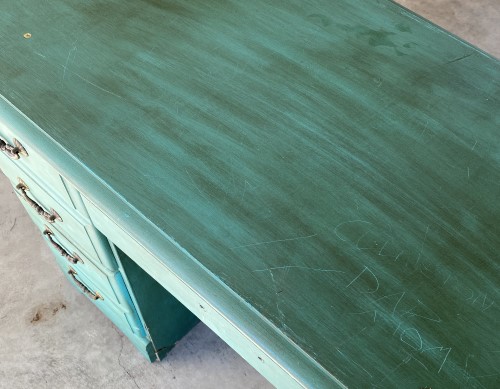
I was worried about the words that had been somewhat engraved into the top of the desk. I wasn’t sure if they would still show through when I painted.
Now that I knew what I was dealing with, I had some decisions to make. I needed to pick out a new color for the desk, and I needed to decide what kind of hardware I was going to replace it with. The current hardware needed two holes on each piece. I thought it might be hard to find hardware that would fit in those same holes, so I decided to drill new holes and find hardware that only needed one hole per piece.
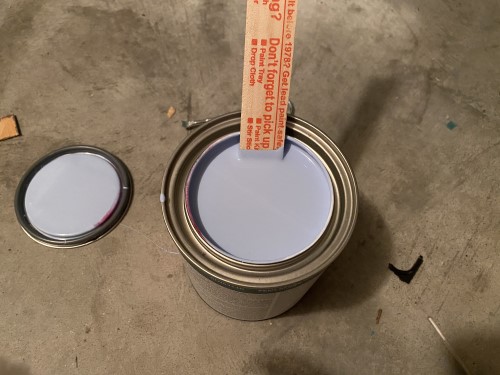
I went to Lowe’s to get what I thought I needed, but once I got there, the woman who was working at the paint counter had some different tips. She showed me exactly what to get and also mixed my paint for me.
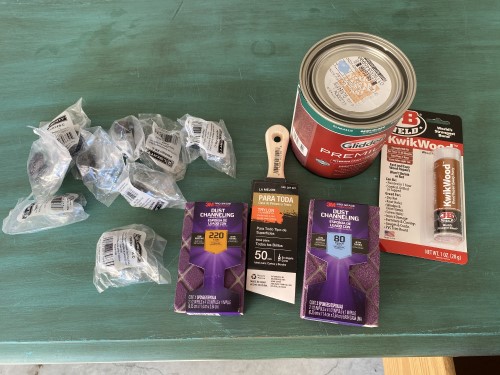
She said I would need to sand the desk twice: once with a coarser grain (the 80 piece above) and once with a finer grain (the 220 above). I also got the paint, wood epoxy to fill in the old holes, a new paintbrush, and the new hardware. I spent about $75 total on the materials, but it would have been cheaper if I hadn’t needed a new paintbrush! If you’re doing a similar project, you might already have some of these items on hand, making it even cheaper.
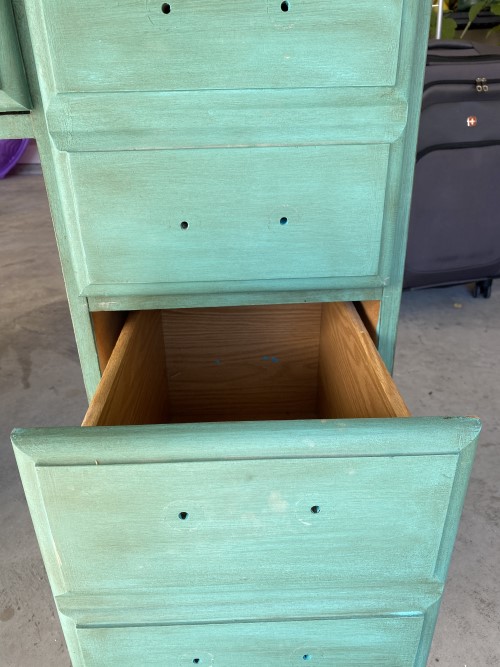
As you can see, the bigger drawers on the side actually look like 2 drawers due to the molding around the edges. I still wanted to put two pieces of hardware on each drawer.
As I started taking out the drawers, I noticed a damaged section on the inner part of the desk. I attempted to fix it with some wood glue, but nothing much helped. I decided I’d just leave it, since it’s not on a visible part of the desk (the place where it is is up against the wall now). Again, the desk was free, so my standards weren’t too high!
A
This is the wood epoxy I used. You roll it around in your hand to make it softer, then fill in the holes. It kind of feels like hard modeling clay.
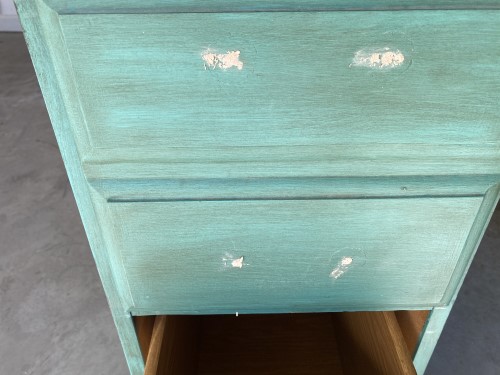
Here is where my beginner status began to show. I tried to make the epoxy level somewhat, but I figured I could get off any extra residue once I started sanding. As it turned out, that proved almost impossible, and I had to Google what would dissolve wood epoxy. Nail polish remover worked pretty well, but it took an extra 30 minutes of work to get the residue off the top so the holes would be flush with the drawers. If I ever do this again, I’ll get the residue off before the epoxy hardens.

Once I filled in the old holes, it was time to drill new holes. A friend recently redid her cabinets and told me about how she bought a special item that helps you easily measure where to drill holes in cabinets. I didn’t have one of those, but I knew what they were like and decided to make my own. I took a piece of cardstock and used a tape measure to figure out where I wanted to drill the holes in the larger drawers and the smaller drawers. Then I used a pencil to push through it so I could mark on the drawers. On each drawer, I just lined up the corner of my “guide” with the corner of the drawer. Then I marked through with the pencil and drilled the hole on that mark.
Once I drilled through the first hole for the hardware, I made sure it would work before I did any more! The good news was that it looked great (and would look even better once I painted).

Once I got all the holes drilled, it was time to sand the drawers and the rest of the desk. I did what the employee at Lowe’s recommended and used the coarser grain sandpaper first. This is what the drawers looked like when I was done sanding with the coarser grain and the finer grain. At this point, I was feeling pretty nervous, as I had invested multiple hours in the project at this point.
Time to paint! I chose a light blue semigloss paint for the desk that I hoped would look good with the black hardware I picked out. The desk was going to go in a room that is relatively neutral, so I wanted some color, but nothing too flashy.
Here’s a comparison of the first coat of paint on a drawer with an unpainted drawer. I could tell immediately I’d need at least two coats.
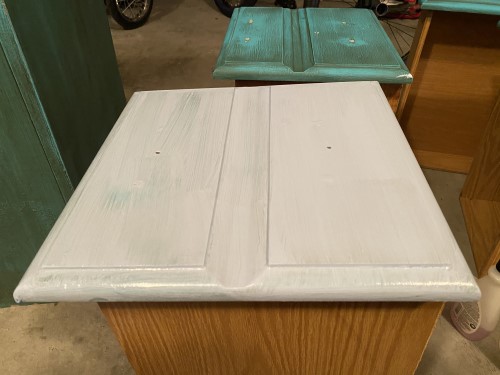
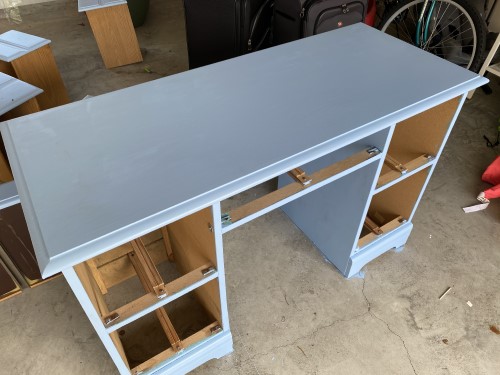
Here’s the desk after the first coat. I was pleased to see that the pencil engravings on the top were not visible after the sanding and the first coat of paint. You can also see the damaged part of the desk in this picture near the bottom right, but again, this part was going to go against a wall once it was inside.
This is the drawers after the second coat. I knew at this point I’d need to do a third coat.
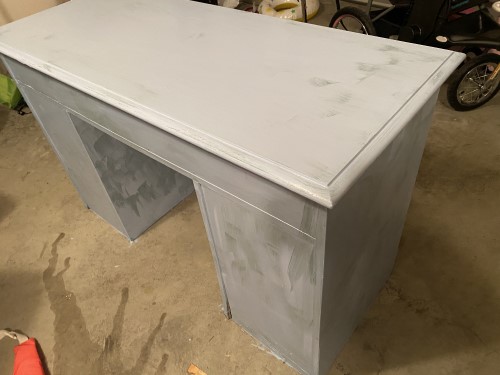
The desk itself looked totally different after a second coat, but it still needed a third coat as well.
Here’s the desk after the last coat! I was so pleased with the final color. At this point, I just had to put the hardware on the drawers and put the drawers back into the desk.
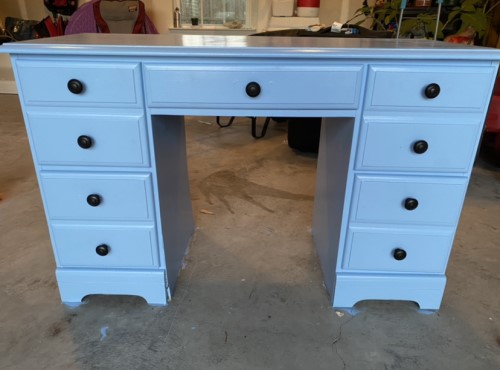
Here is the final product, which I turned out even better than I expected. Not only do I love the blue/black combination, but it looks like a completely different piece of furniture.
All told, I spent about $75 and probably 4 hours of time on this desk. A new desk would have cost several hundred dollars, and it might not have been the exact color I wanted. I loved the experience of customizing the colors and hardware, and I honestly didn’t mind the manual labor involved. I’m not sure this is something I’m going to do frequently, but I was glad to find out that it’s not as overwhelming as I imagined it to be.
Have you ever redone a piece of furniture? Tell us about it in the comments!