This post may contain affiliate links. Read our disclosure here.
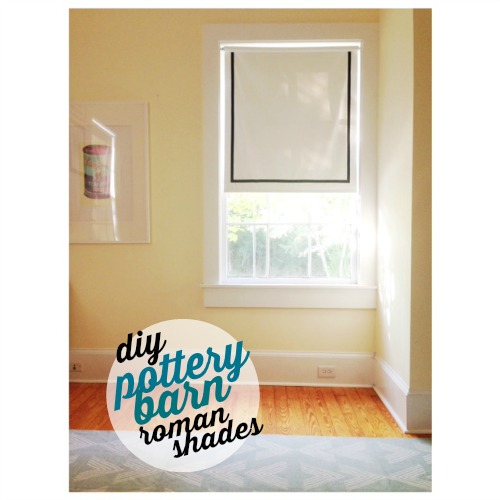
If you’ve ever gone shopping for new window treatments, you know how expensive they can be, especially if you have to get them custom made for a window that isn’t a normal size. One of my friends recently wanted to get some new shades for her windows and she really wanted roman shades, something similar to Pottery Barn’s grosgrain ribbon roman shades. The windows in their house, however, are old and an odd size, so the shades from Pottery Barn wouldn’t fit (plus they start at $150 each). To get a similar roman shade custom made was going to be super expensive (one company quoted at $800 for two windows…whoa). So, she started thinking more frugally and made her own!
To create a similar look to the Pottery Barn roman shades for a lot less, head to your local home improvement store (like Lowe’s or Home Depot) and look for vinyl roller shades that can be cut in-store to your specific dimensions. You can buy them for about $15 each, it’s free to have them cut, and they can do it right there in the store while you shop. Grab some ribbon from a craft store and you’ll be on your way to personalized window treatments.

Here’s what you’ll need:
-vinyl roller shades cut to your windows’ dimensions
-ruler
-pencil
-ribbon of your choice
-scissors
-hot glue gun
Here’s how to do it:
- Decide what design you’d like your ribbon to be in to make sure you’ll have enough.
- Unroll the vinyl shade on a clean, flat surface in a standard roll so that it rolls under and not over (when the shade is hung, the actual shade will be the closest to the window rather than the roll). This way, the ribbon won’t look clumped up on the roll when the shade is open. Use the ruler and pencil to mark where you’d like the ribbon to be (the ribbon in the picture is 2 inches all the way around from the edge of the shade). This will make it easier and a lot more precise when it’s time to glue the ribbon on.
- Use the hot glue gun to attach the ribbon all the way around the shade. It’s easiest to work in small sections, a few inches at a time, so the ribbon is straight and the glue doesn’t dry before you can work with it. Also, try to hold the vinyl shade and ribbon tight the whole time you’re gluing so your shade looks clean and crisp.
- Allow each section to cool before moving on and continue to glue the ribbon until you reach the top of the shade when the whole thing is unrolled.
- Hang the shade according to the directions on the shade package.
To do two windows, it cost about $35 (including the ribbon and shades). That’s a whole lot better than $800 and I think it’s always pretty fun to work on your own DIY project anyway.
See more frugal living ideas!